Creating and binding a route to an object
First, you need to create a route in the Routes module.
You can create a new route through the routes module or create it from a track in the object's history.
To create a route from the object's history, you need to:
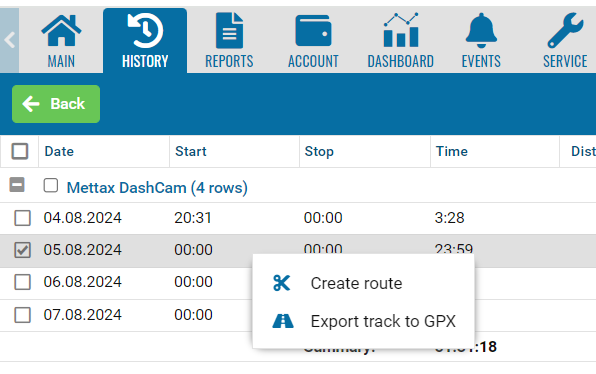
• Select an object in the history section and select a track line for any of the days.
• Right-click to open the context menu. Select "Create route".
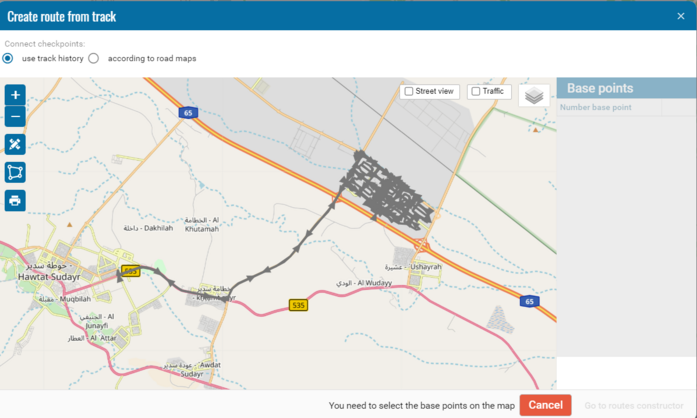
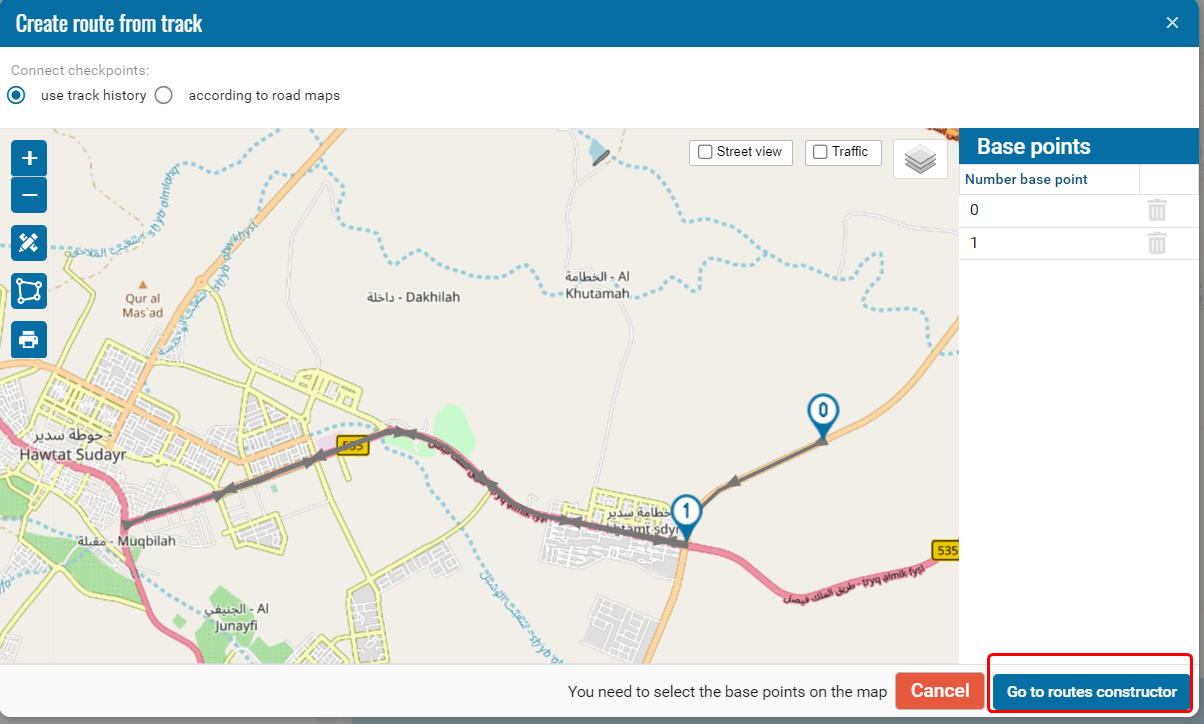
In the window that appears, first select the start point and end point of the route in order to cut the track.
Cut the track from history.
• Click on the Create route stash and go to the Create route window.
• When you click on the entire track, it will be highlighted in green. The green line symbolizes the "selectable" route.
Next, you need to mark the route checkpoints on the track.
These points will have their own check radius.
Events on entry and exit from the checkpoint are registered separately.
Just like on the route, you can place the points by clicking the mouse along the line.
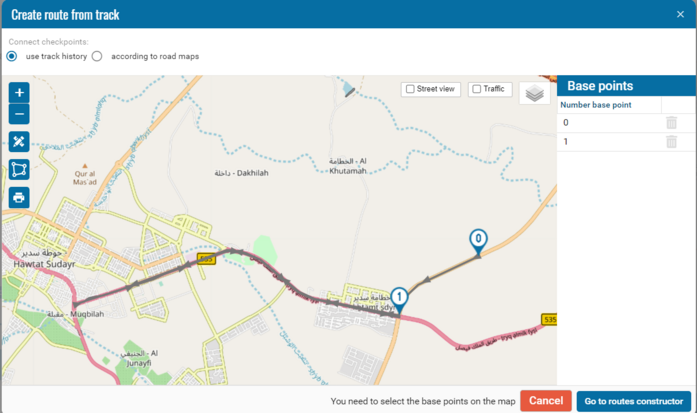
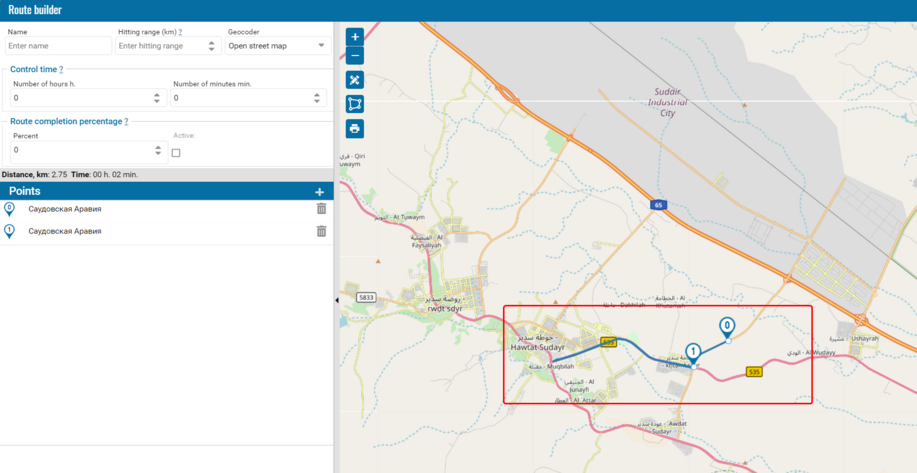
Next, go to the route creation window.
You will find yourself in the routes module.
In the window where you were at the beginning.
But now there will be that piece of the path that you marked.
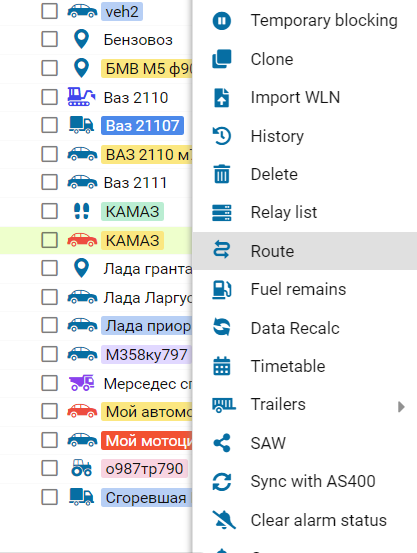
Link the route to the car.
To register events along the route for the car and generate reports, go to the "Online" section, right-click on the car, and select the "Route" section.
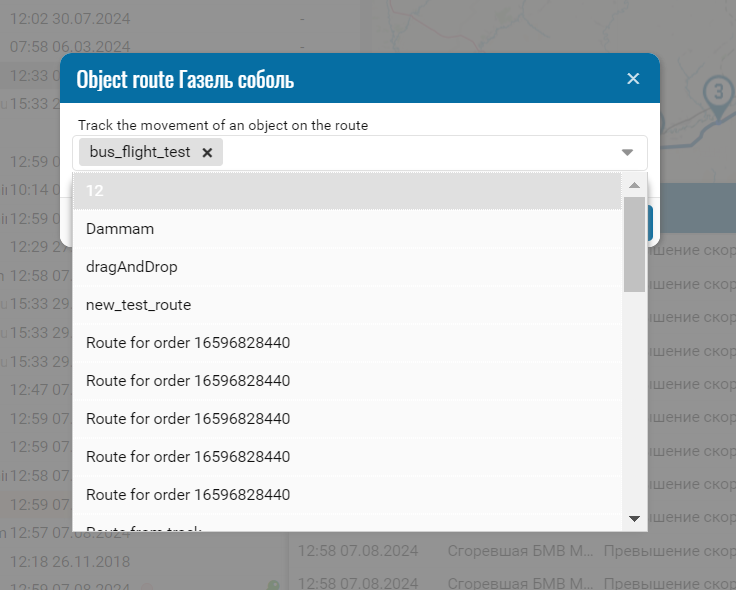
In the window that appears, select the routes that we would like to link to the car.
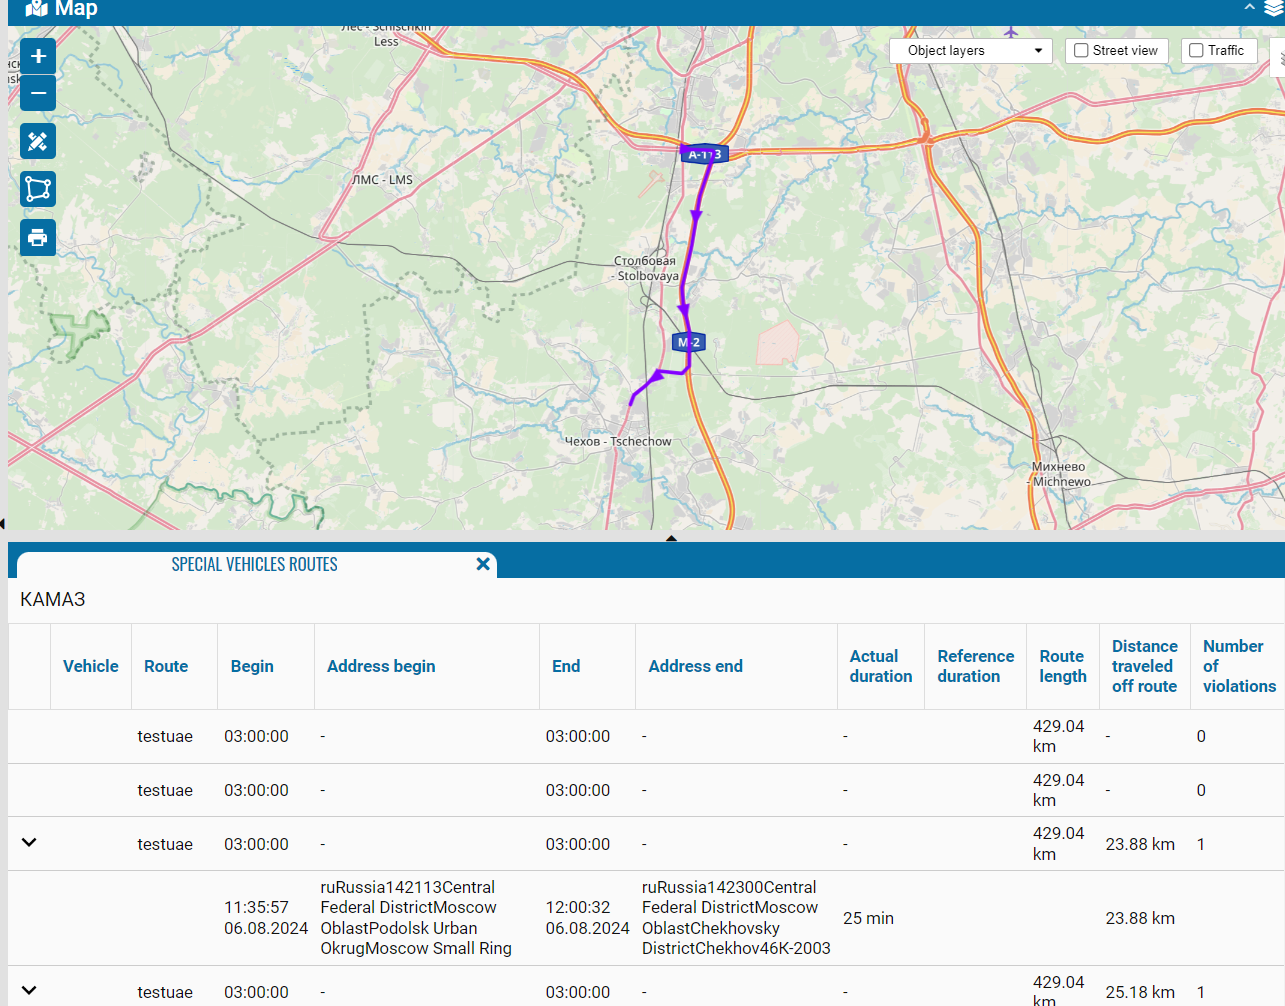
• Enable the report in the contract "Special equipment routes".
• Build a report
• A report built for an object with a map when you click on a line in the report, the track will be highlighted in color.