Objects
The Objects tab displays all object relay configurations available to the current user.
Object list
To open the object list, go to Relaying→ Objects.

Here you can:
— find a specific object
— see which endpoint is used for data transmission
— enable or disable object relay
— open relay settings
— view transmission statistics for an object

Top panel
The following actions are available on the top panel:
• Configs — relay configuration settings
• Export — export the object list
• Statistics — select the period used for mini-graphs
• Search — search within the table
• Clear filters — reset all filters
Table columns
• Actions — available actions for the object relay configuration
• ID — relay record identifier
• Agent ID — object identifier
• Host — IP address or domain name of the external server
• Port — external server port
• Format — data transmission protocol
• Statistics / Err — error mini-graph
• Statistics / Send — transmission attempts mini-graph for the selected period
• Statistics / Ack — successfully accepted packets mini-graph for the selected period
• Last ID — identifier of the last processed packet
• Uspw — authentication data
• Time Zone — object relay time zone
• On /Off
/Off  — relay status (enabled or disabled)
/Off — relay status (enabled or disabled)Object actions
The following actions are available in the Actions column:


 — turn object relay on or off
 — open the object relay settings
You can also open the edit form by double-clicking the object row.
The edit form allows you to modify settings that apply only to the selected object.
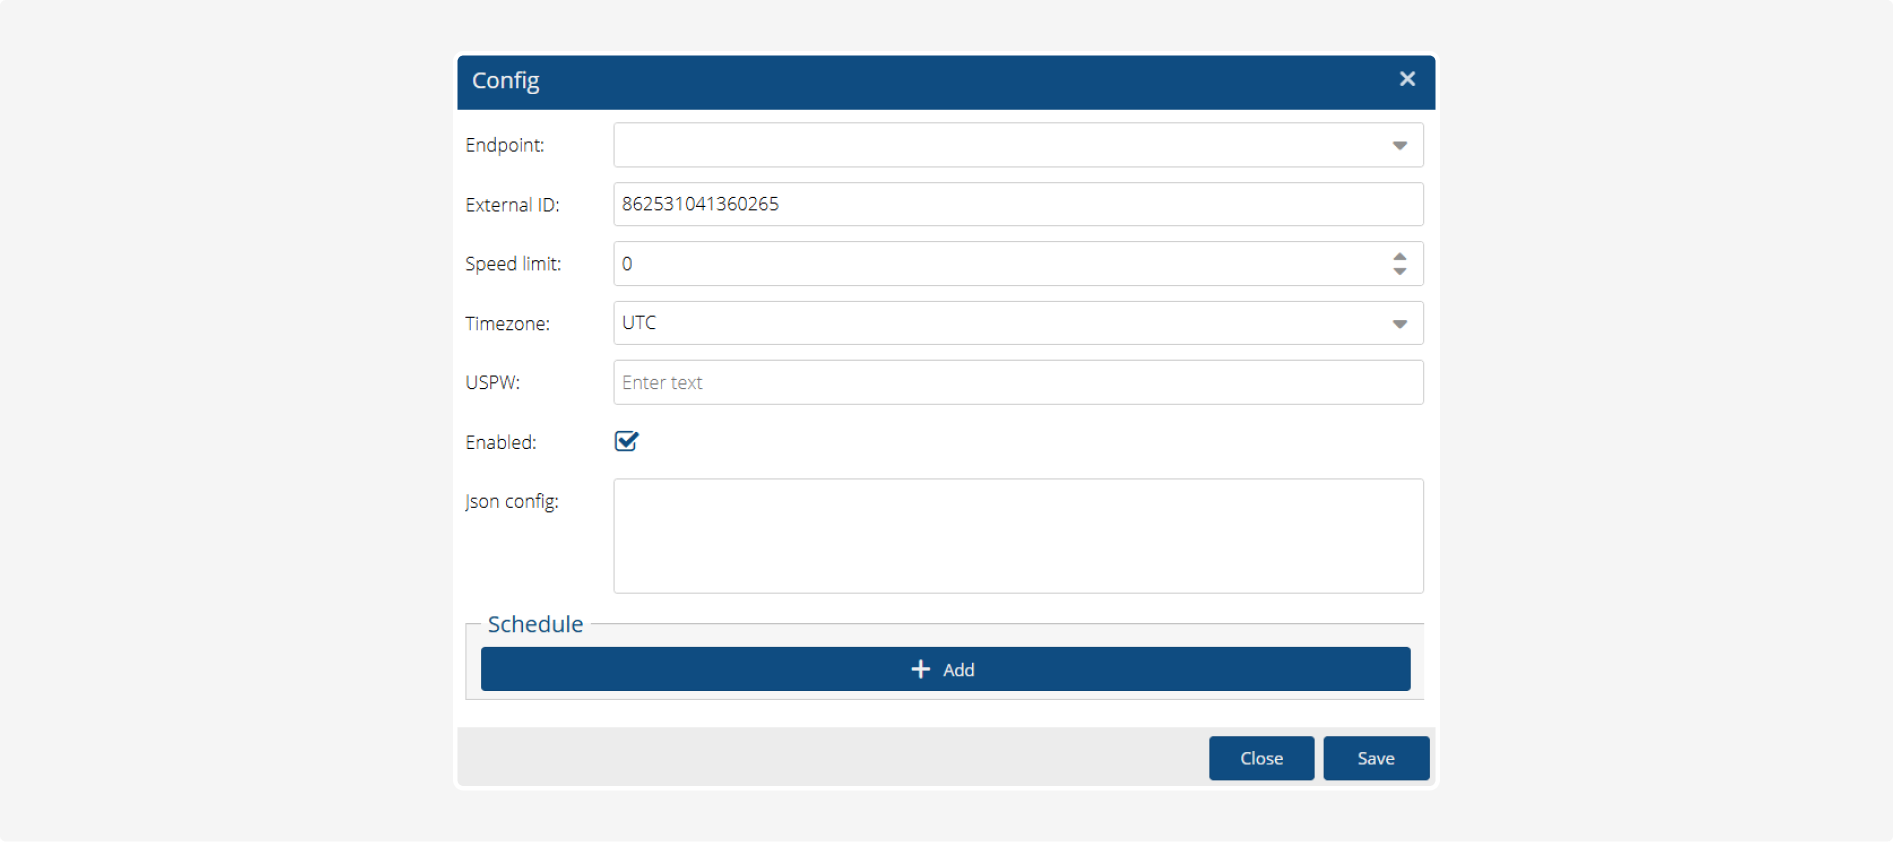
If you need to change the server address, port, transmission protocol, or connection path, edit the corresponding endpoint in the Endpoints tab.
Managing relays from the Vehicles section
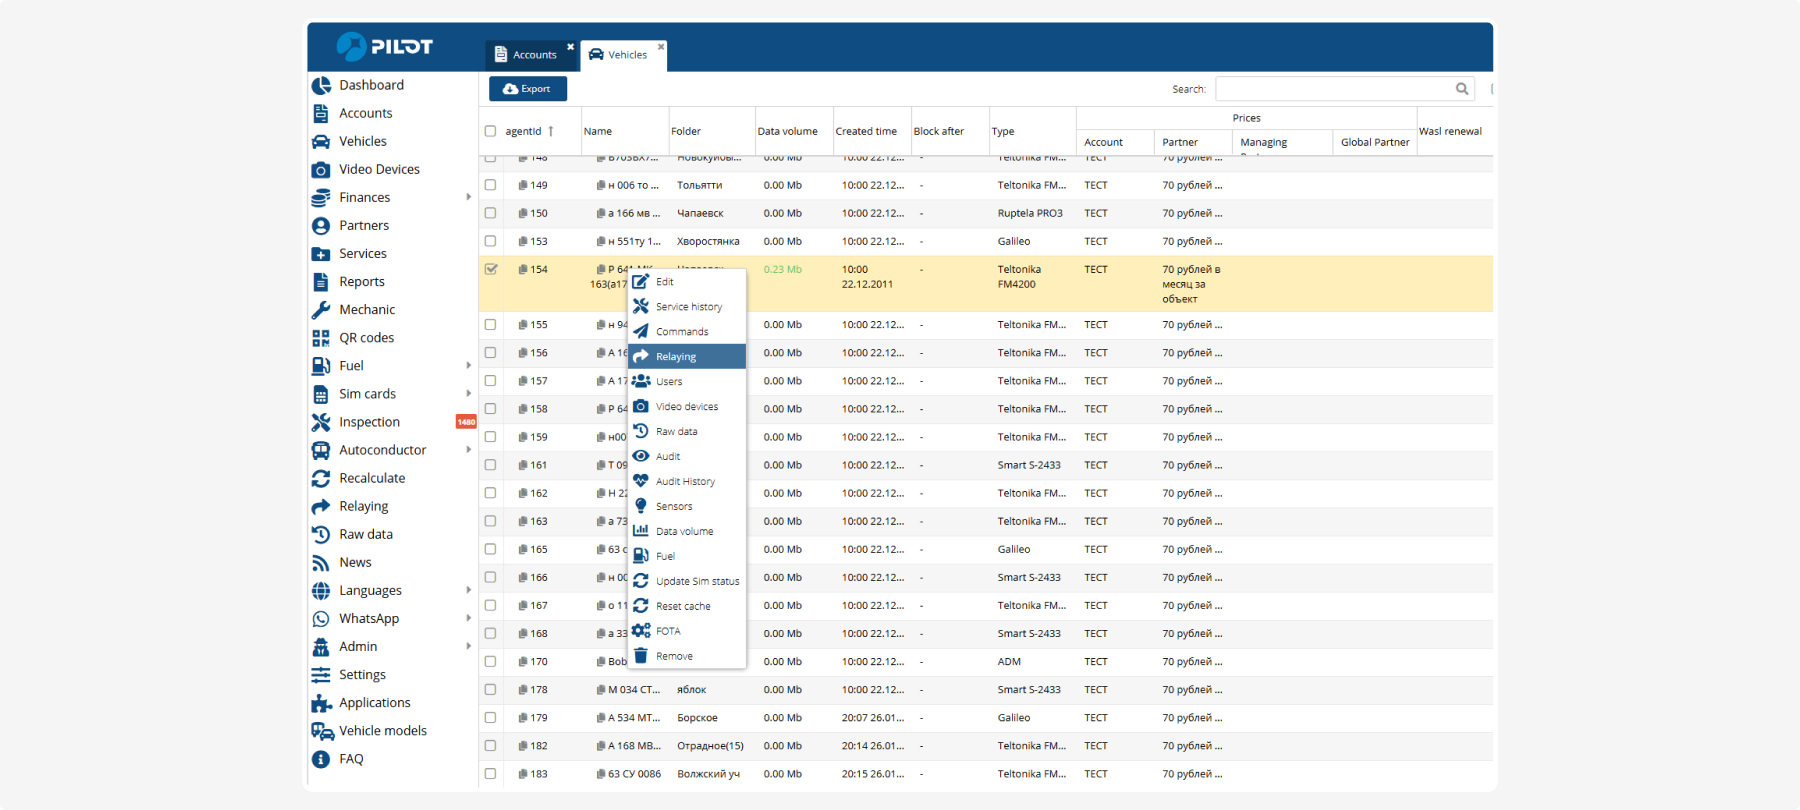
Relay configurations can be managed not only through the Objects tab in the Relaying section but also directly from the object list in the Vehicles section.
To do this:
1. Open the Vehicles section
2. Select one or more vehicles
3. Right-click the selection
4. Choose Relaying from the context menu
Relays for a single vehicle
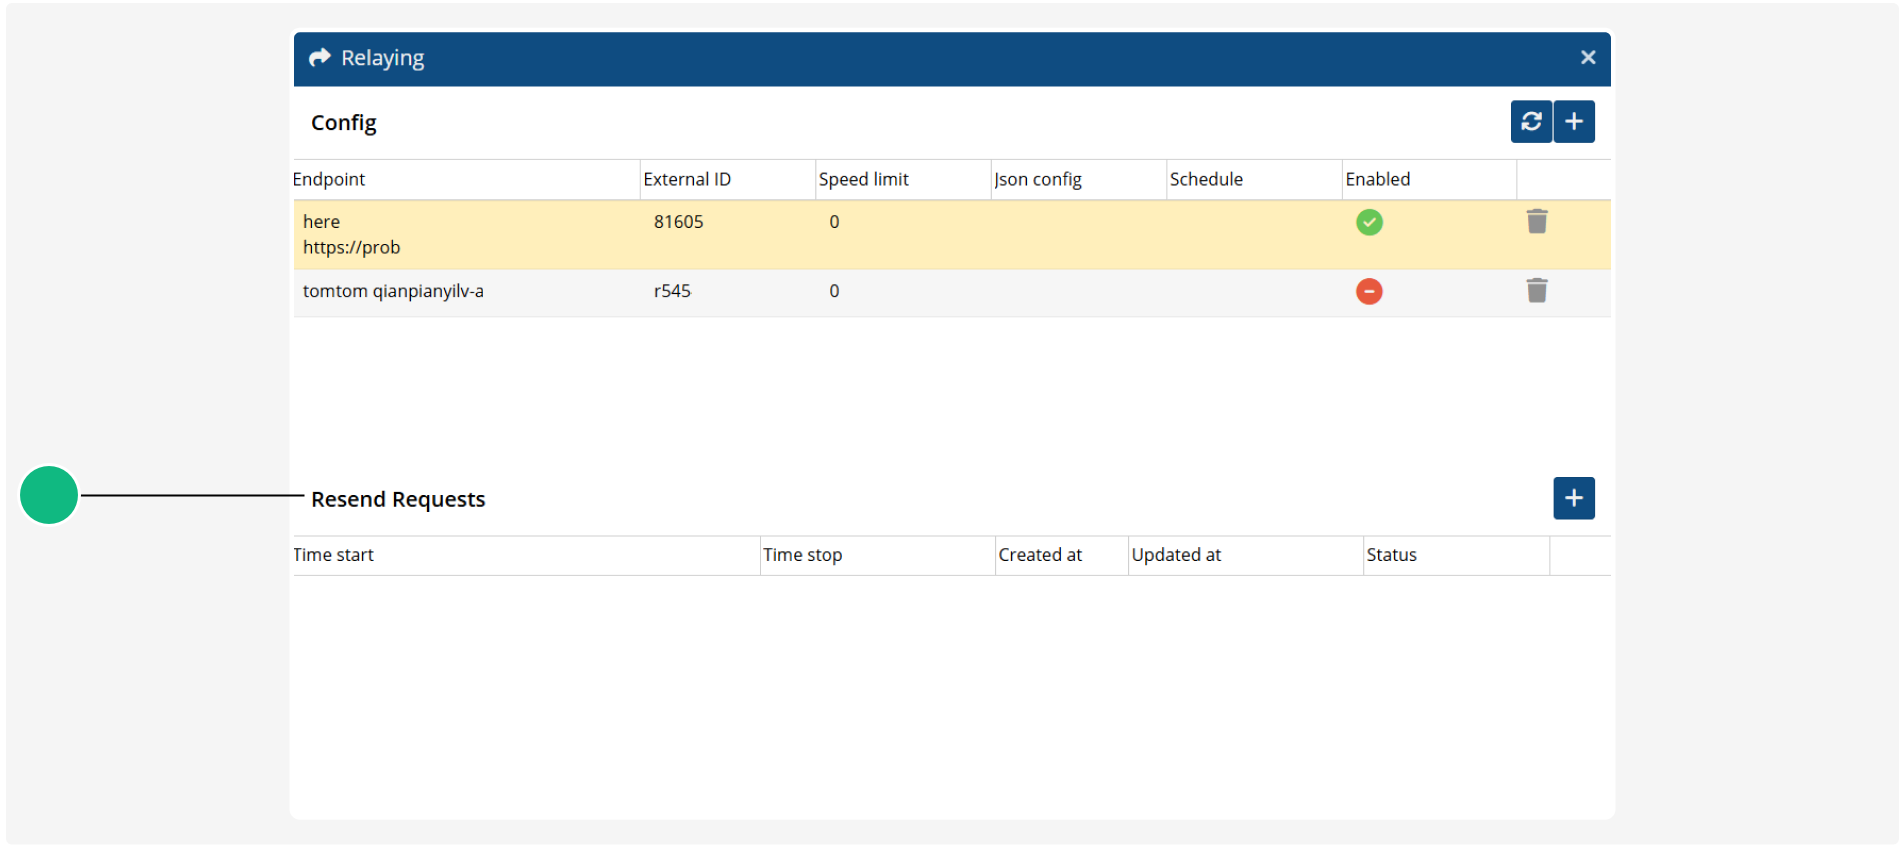
If a single vehicle is selected, the relay management window for that object opens.

The window contains two sections:
Configuration
Displays all relay configurations assigned to the object.
From here you can:
— add a new relay
— edit an existing relay
— delete a relay
— enable or disable data transmission
Resend requests
Contains requests for retransmitting historical data for a selected period.
Relays for multiple vehicles
If multiple vehicles are selected, the menu item appears as Relay (N), where N is the number of selected objects.

This allows you to create the same relay configuration for several vehicles at once.

The system creates a separate relay record for each selected object using the same endpoint
How to add a relay
1. In the Vehicles section, select one or more objects
2. Open the context menu with a right-click
3. Select Relaying
4. In the Configuration section, click Add 
The relay creation form will open.

Fill in the required parameters:
• Endpoint — data transmission destination
• External ID — object identifier in the external system
• Speed Limit — transmission speed limit
• Time Zone — object time zone
• Uspw — authentication data
• Enabled — enables or disables the relay
• JSON Config — additional settings in JSON format
• Schedule — transmission schedule
The Host, Port, Format, and Path fields are inherited from the endpoint and cannot be edited here.
To modify these settings, edit the corresponding endpoint.
After saving, the object will begin transmitting data through the selected endpoint.
Resend requests
The Resend requests section is used to retransmit previously stored data for a specified period.
This feature is useful when:
— data was not successfully delivered to the external system
— historical data needs to be retransmitted
How to create a resend request
1. In the Resend requests section, click Add
2. Specify the start date and time
3. Specify the end date and time
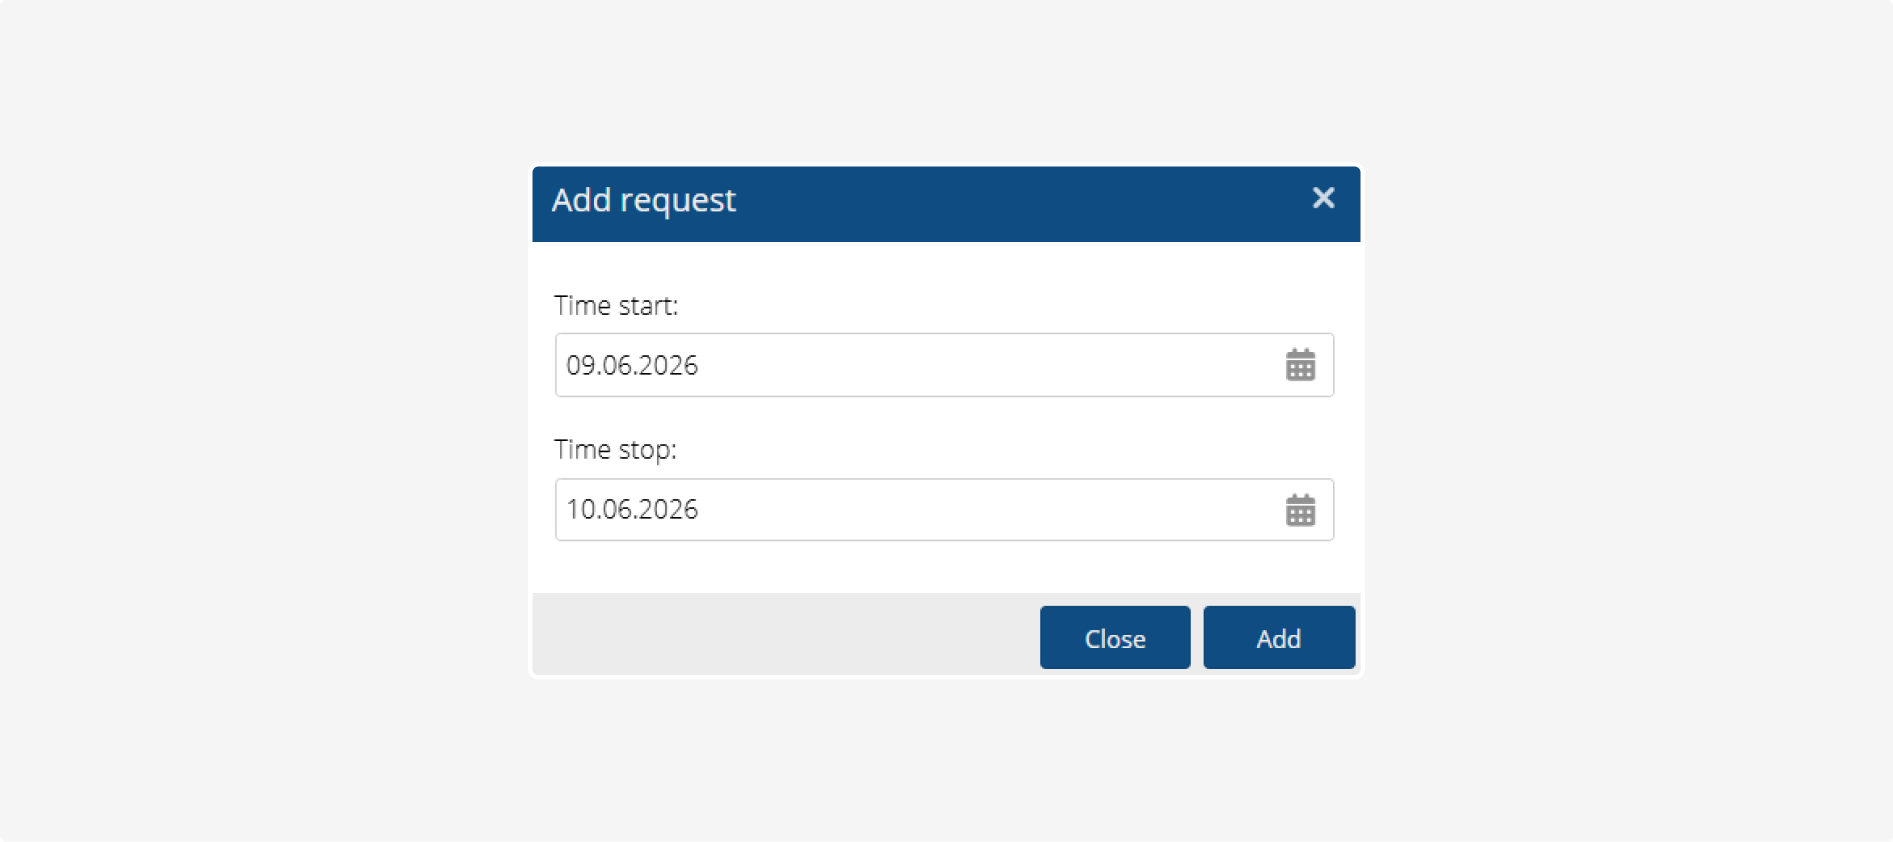
4. Click Add
The request will appear in the table.

Resend requests table columns
• Start Time — beginning of the retransmission period
• Stop Time — end of the retransmission period
• Created At — request creation date and time
• Updated At — date and time of the last update
• Status — current request status
Available statuses:
• New — request created and waiting for processing
• In Process — data retransmission is in progress
• Complete — processing completed
After the request is completed, all data for the selected period will be retransmitted through the chosen relay configuration.