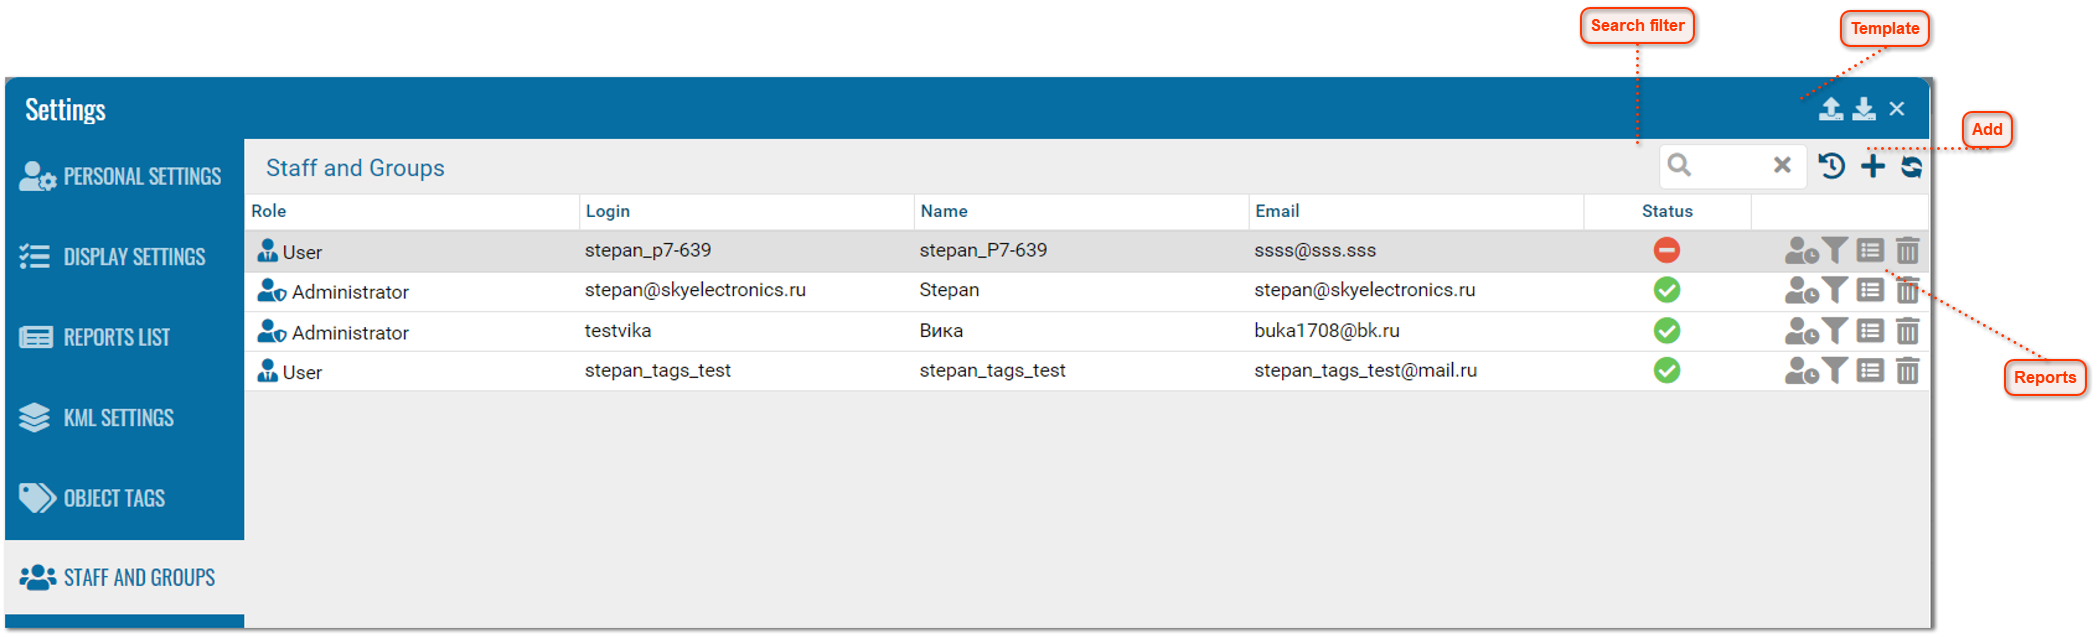
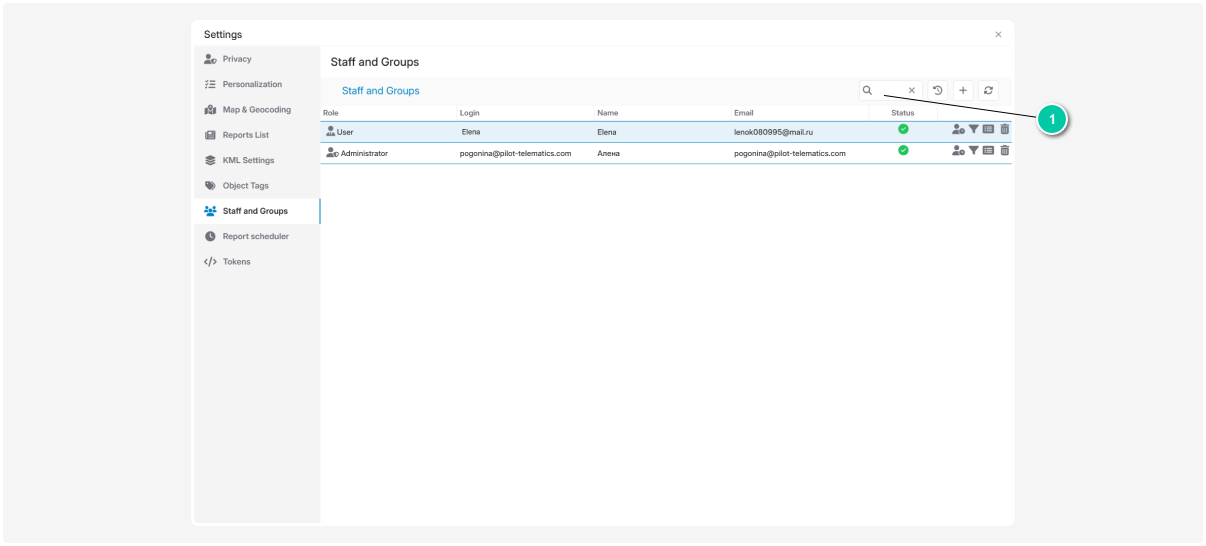
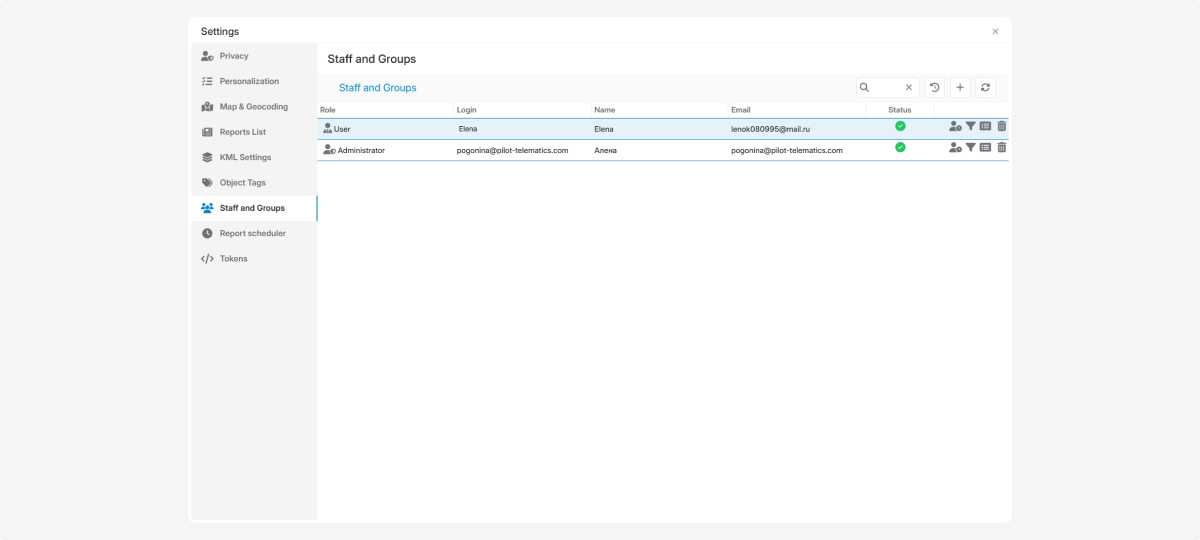
Staff and groups
In the Staff and groups tab you can:
— create new accounts
— edit existing profiles
Create and use:
Managing user profiles
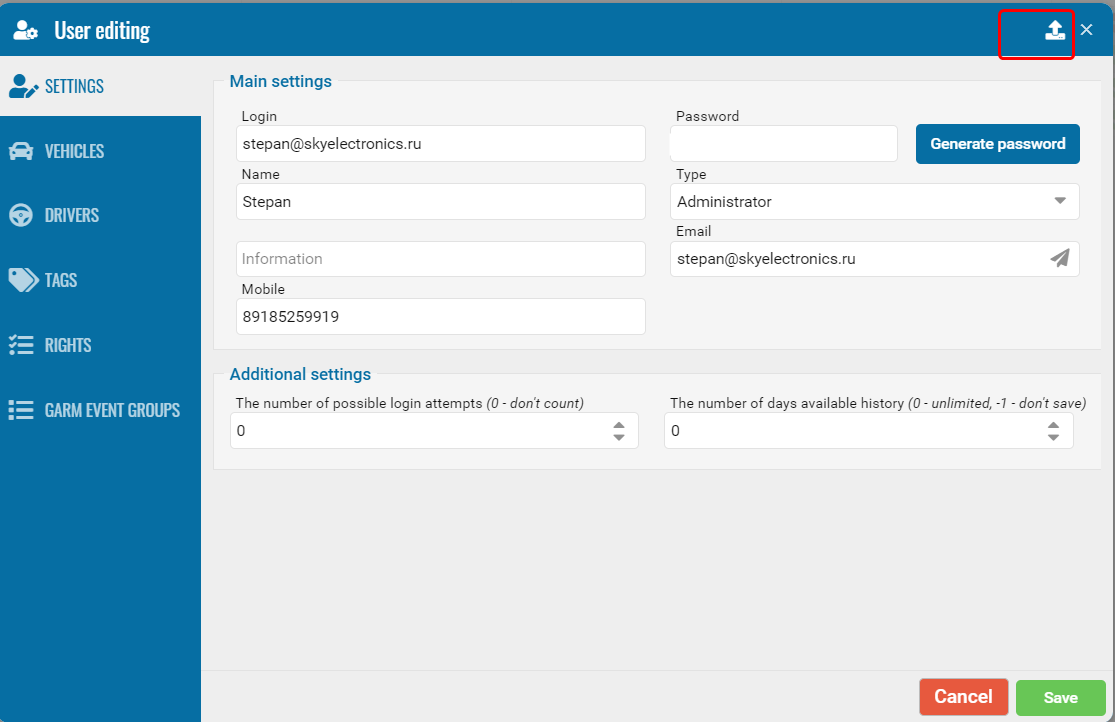
Click Add user to create a new user and set their permissions. This opens the user card for editing.
The user card lets you configure access for each employee (objects, tags, reports, view rights, etc.). You decide what information the user can see and what actions they can perform.
User settings
-
In the Settings tab of the user card, fill in the required fields:
-
Login
-
Name (e.g., first and last name)
-
Mobile phone
-
EmailClick the envelope icon
 in the Email field to send the user a sign-in link.
2. Set a password for the user:
-
Check the Password box
-
Enter a password, or click the generate icon
 to have the system create one3. Choose the user type. PILOT has two types with different access levels:
 -
AdministratorCan add users, objects, drivers, and configure permissions for all users under the contract. Manages all user settings.
-
UserA regular portal user with limited rights. The administrator decides what the user is allowed to do.4. Click SaveAfter saving the Settings tab, configure the user’s access rights.
Search for users
Use the Search field in Staff and groups to find a user.
How to search:
-
Enter a login or other details in the search field
2. The list will automatically refresh to show matching users
Clear the search field to return to the full list.
The search is not case sensitive.
View login history
To view user authentication history:
-
In the Staff and пroups tab, click the login history icon

2. A window will open with details of the most recent logins
Use the calendar to select a specific time period.
To export data in CSV format, click the download icon  .
.
ЧTo refresh the log, use the refresh button 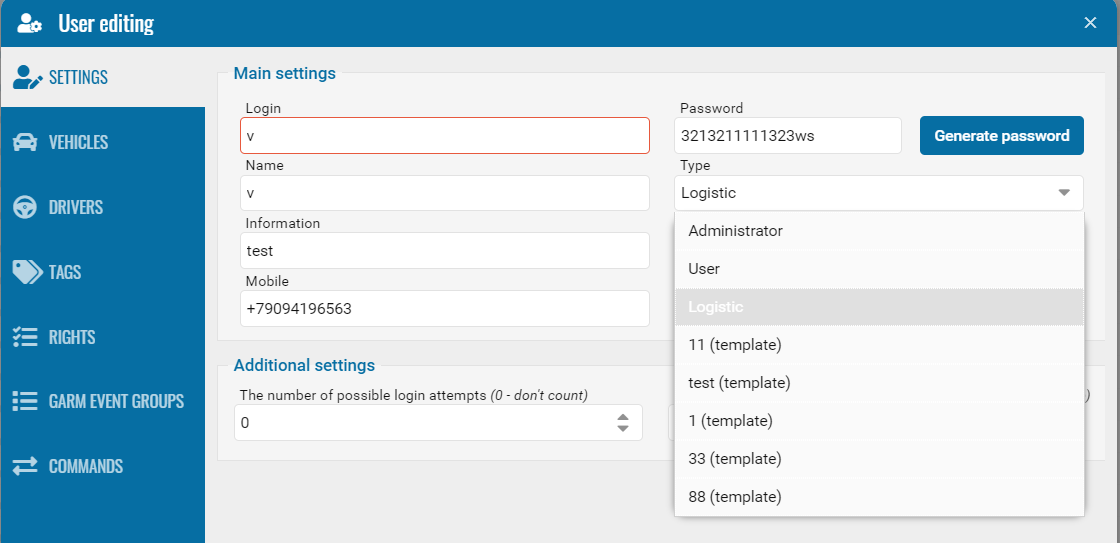 .
.
Editing a user profile
How to edit an existing user profile:
-
Find the required user in the list
2. Double-click their name
3. The user settings window opens, where you can make changes
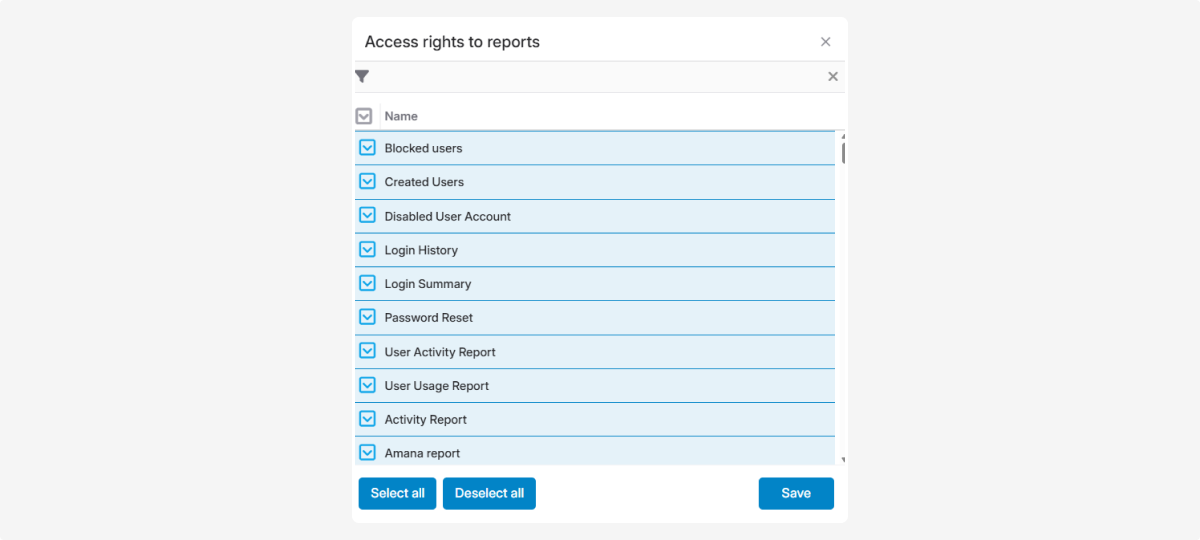
Assigning reports to a user
To allow access to reports:
1. Select a user in the list
1. Select a user in the list
2. Click the reports icon 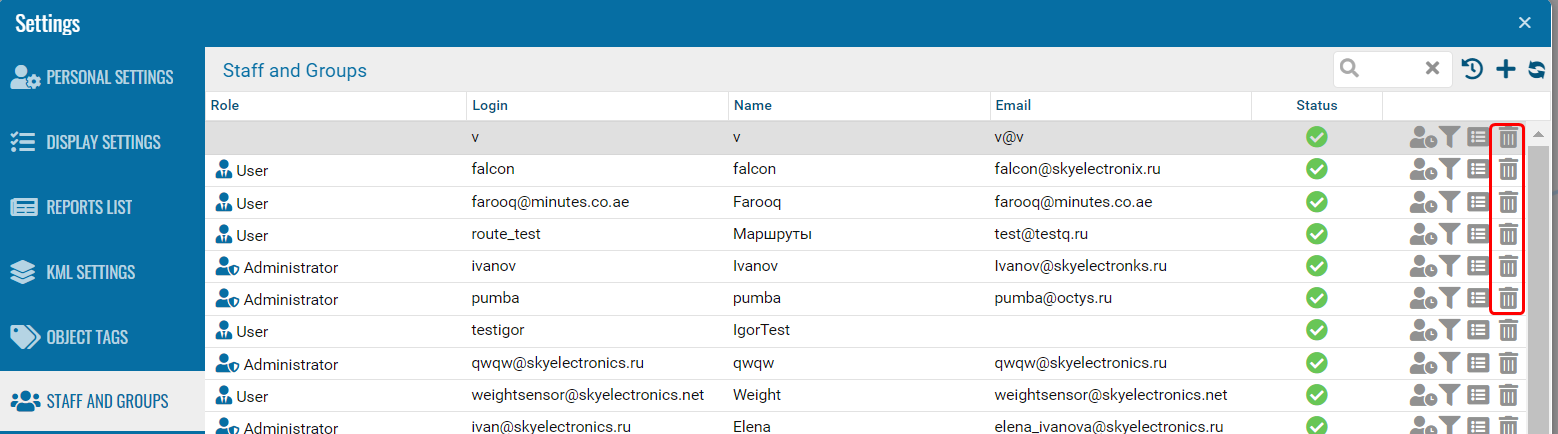
3. A window with report options will open
4. Tick the reports you want to assign and click Save

IP Filtering for a user
To set up IP filtering for a user:
-
Find the user in the list2. Click the icon
 next to their name3. In the window, tick Enable filtering4. Enter the IP addresses from which the user is allowed to log in5. Click Save IP list
You can read more about IP filtering here.
Managing user blocking
To block a user:
1. Find the user in the list

2. In the Status column, click the status icon 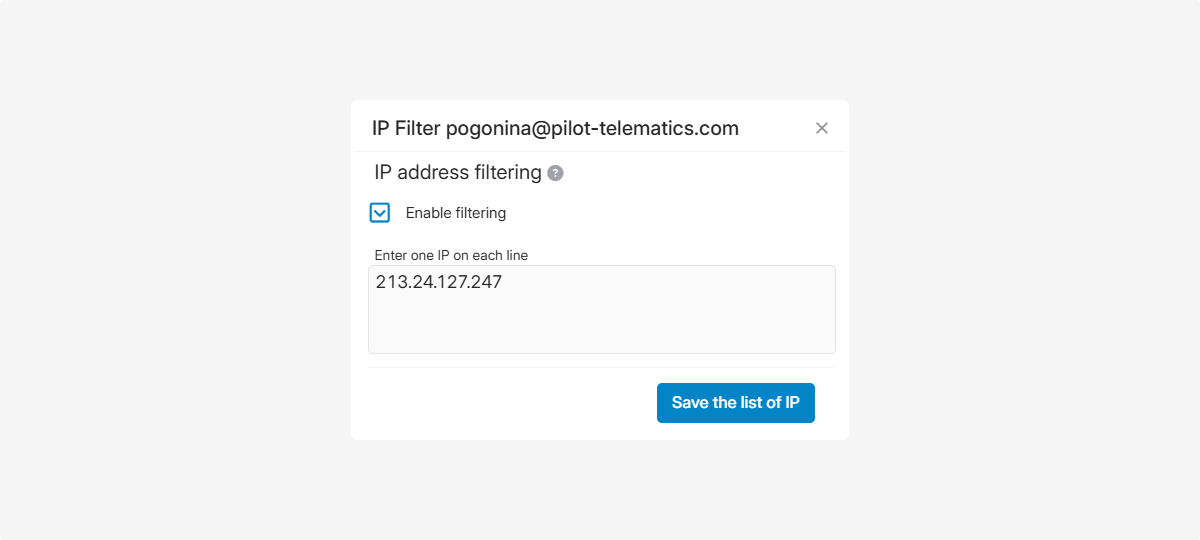
3. Confirm by clicking Yes
4. The user’s status will update
A blocked user cannot log into the system.
|
To unblock a user:
1. Find the blocked user in the list
2. In the Status column, click the status icon 
3. Confirm by clicking Yes
4. Access will be restored
Deleting a User
To delete a user, click the trash bin icon 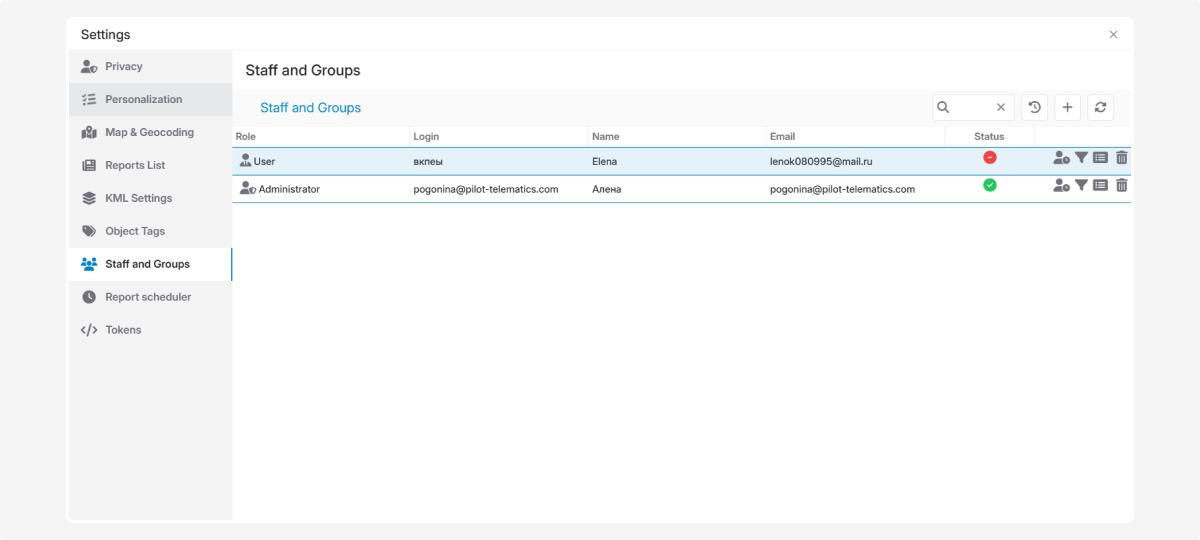 in the user list.
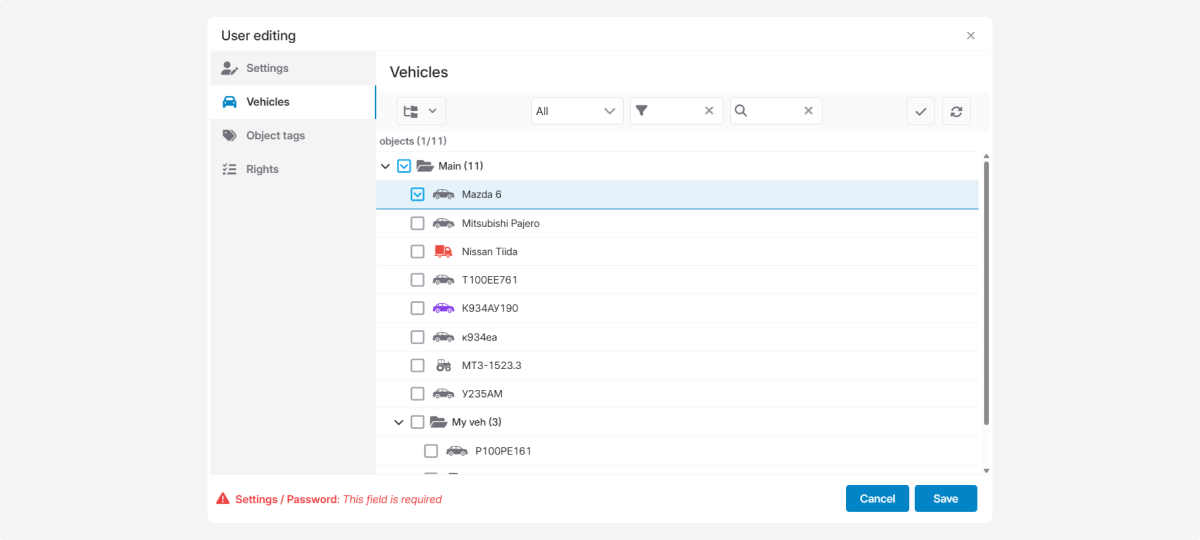
After filling in the main user information in the Settings tab, set their access rights.
Vehicles
When adding a new object, don’t forget to grant employees viewing rights.
The system does not automatically provide access — you must assign it manually.
Steps:
1. In the user card, go to the Vehicles tab
2. Tick the objects the user should have access to
3. Click Save

Every time you create a new object, you must assign access rights manually, including objects from mapping contracts.
|
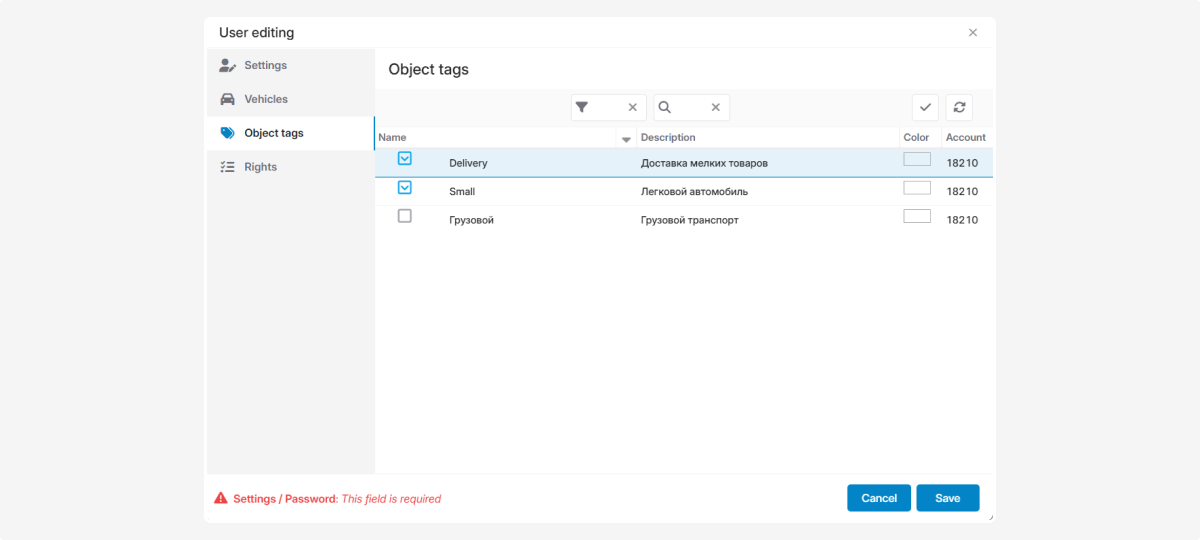
Tags
Grant users rights to work with tags:
1. In the user card, go to the Object tags tab
2. Tick the tags the user can work with
3. Click Save

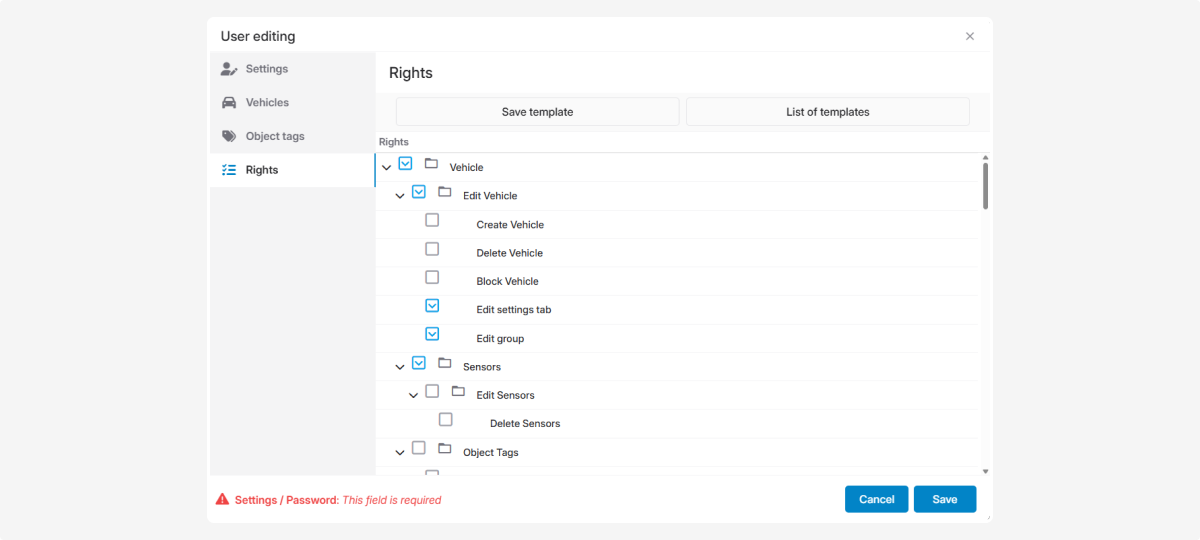
Rights
In the Rights tab you can provide users with access to specific system functions.
These define what actions they can perform: create, edit, delete, or view objects, sections, and modules.
Examples of rights:
• Work with vehicles
• Manage tags and sensors
• Access financial data
• Work with reports
• Configure contract settings
• Manage geofences
• And more — the list expands when additional modules are connected
How to grant rights:
1. In the user card, go to the Rights tab
2. Tick the rights you want to assign
3. Click Save
Interface
In the Interface tab, you can configure which sections and modules are visible to a specific user.
Here you can:
— enable or hide individual modules for a particular user
— disable main menu sections (for example, the Online tab with vehicles)
— customize the interface individually for each user
If a checkbox is selected, the section will be displayed.
If the checkbox is cleared, the section will be hidden from the user’s interface.
Example
If no additional modules are enabled in the account, the Interface tab may contain only a few options — for example, the ability to hide the Online tab under the Main section.
Now consider a situation where many modules are enabled in the account, but a specific employee needs access to only one — for example, the Control room module (formerly called GARM).
How to configure:
1. Go to the Staff and groups section
2. Double-click the required user
3. Open the Interface tab
4. Uncheck the modules that are not needed
5. Click Save
6. Refresh the page
After that, only the selected module will remain visible in the user’s menu.
Setting access rights to additional
modules
When certain modules are connected, additional tabs appear in the user card for configuring access rights to that module.
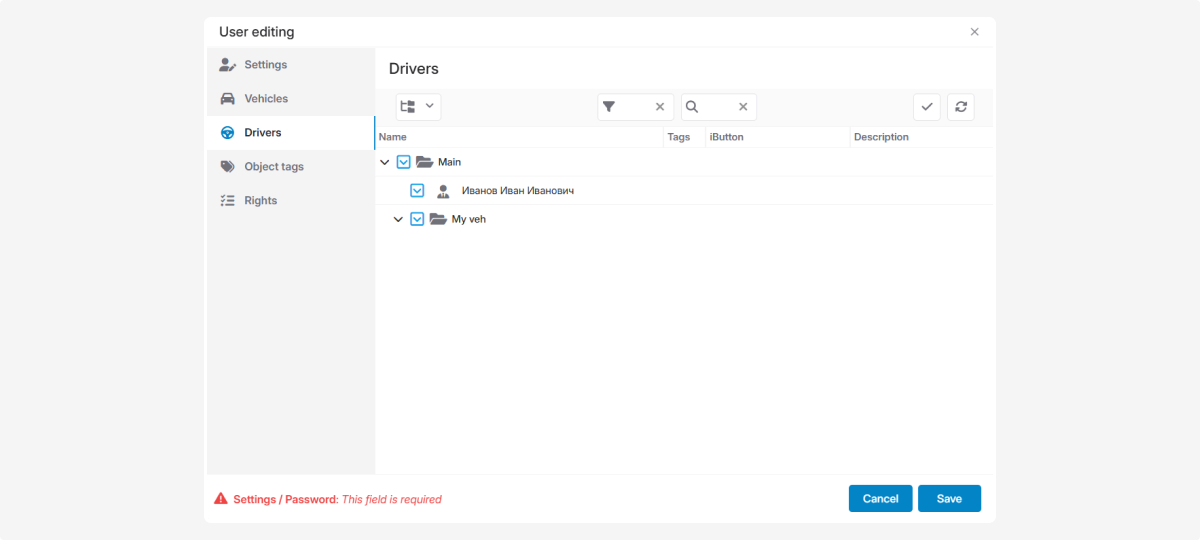
Example — Drivers module
To grant a user access to drivers:
1. Open the user card
2. Go to the Drivers tab
3. Tick the drivers for access
4. Click Save

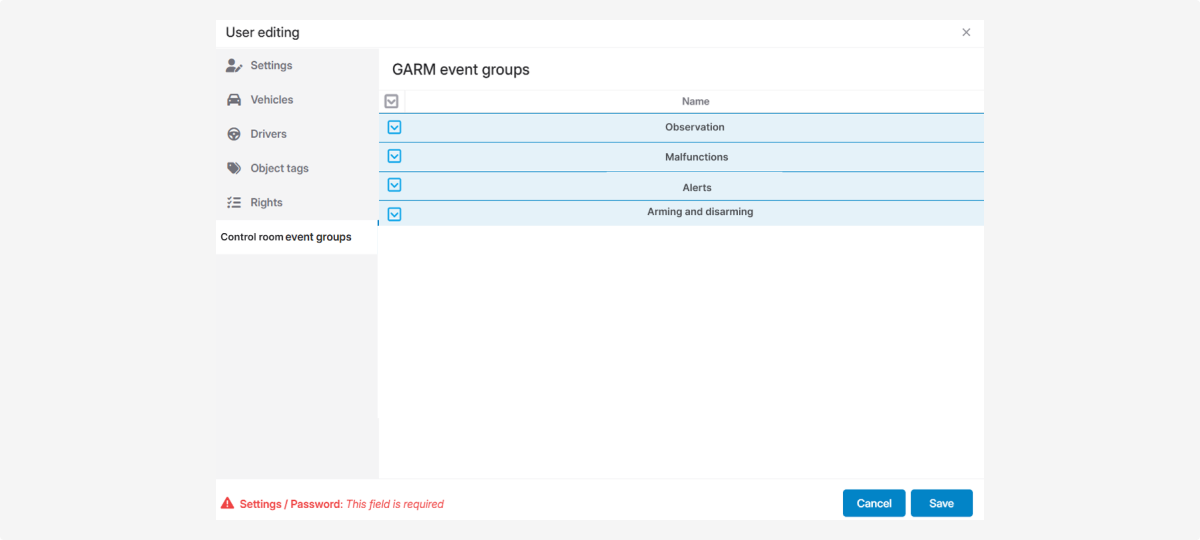
Example — Control room module
To set which events the user can see:
1. Open the user card
2. Go to the Control room events group tab
3. Tick the event types to assign
4. Click Save
Templates are a quick way to apply predefined settings to new or existing users.
If you frequently set the same access rights for similar user types, use templates.
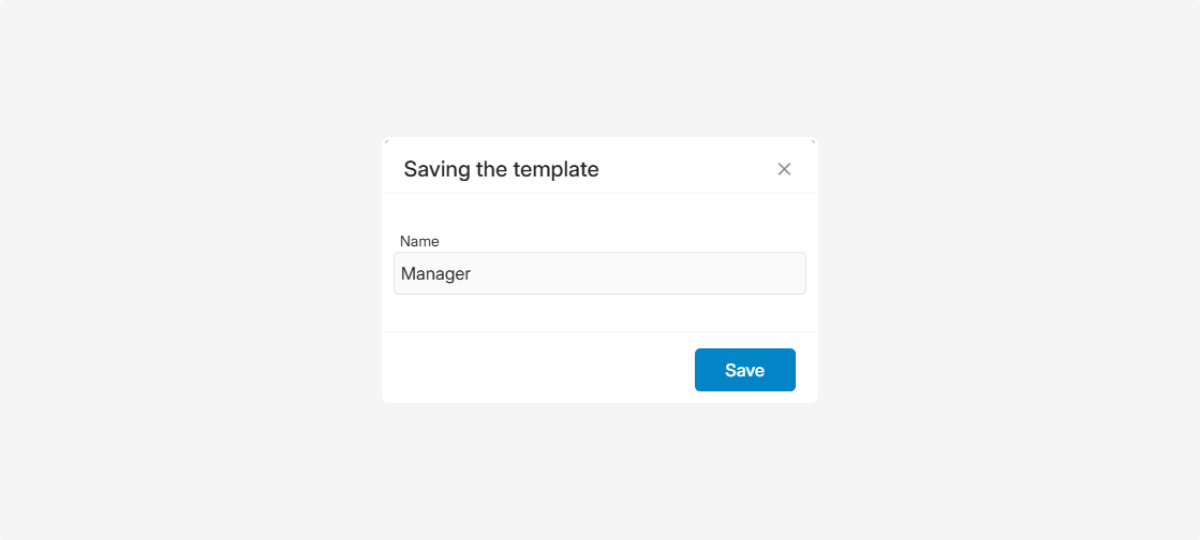
How to create a user rights template:
1. Find a user whose access rights you want to save as a template
2. Open their user card
3. In the Rights tab, click Save template
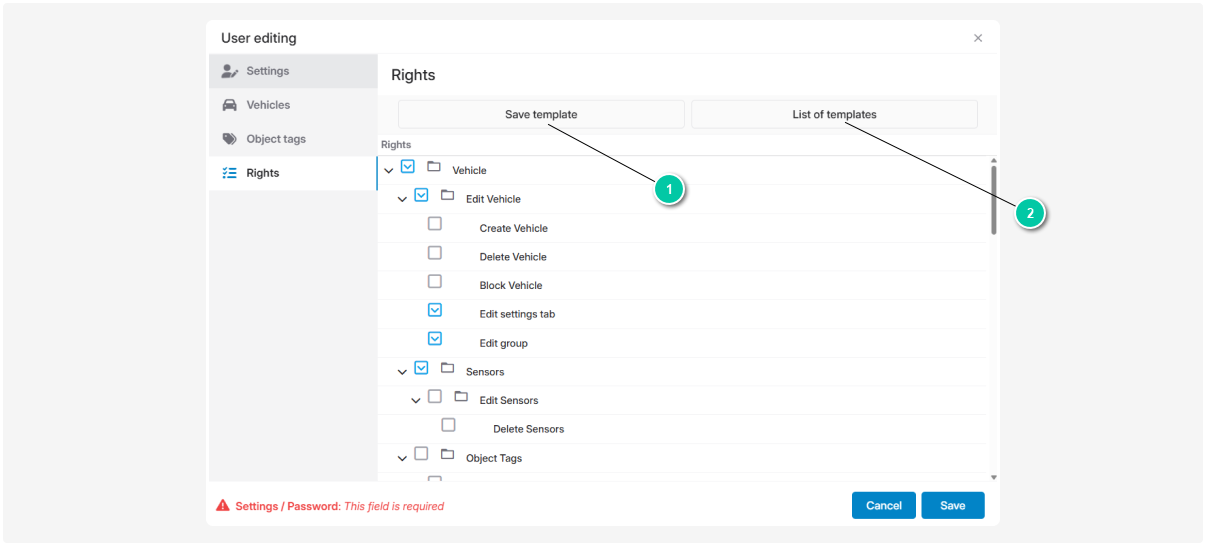
1 — Save templates
2 — Template list
4. In the Save template window, enter a name that clearly describes the type of user

5. Click Save — the template will appear in the Template list
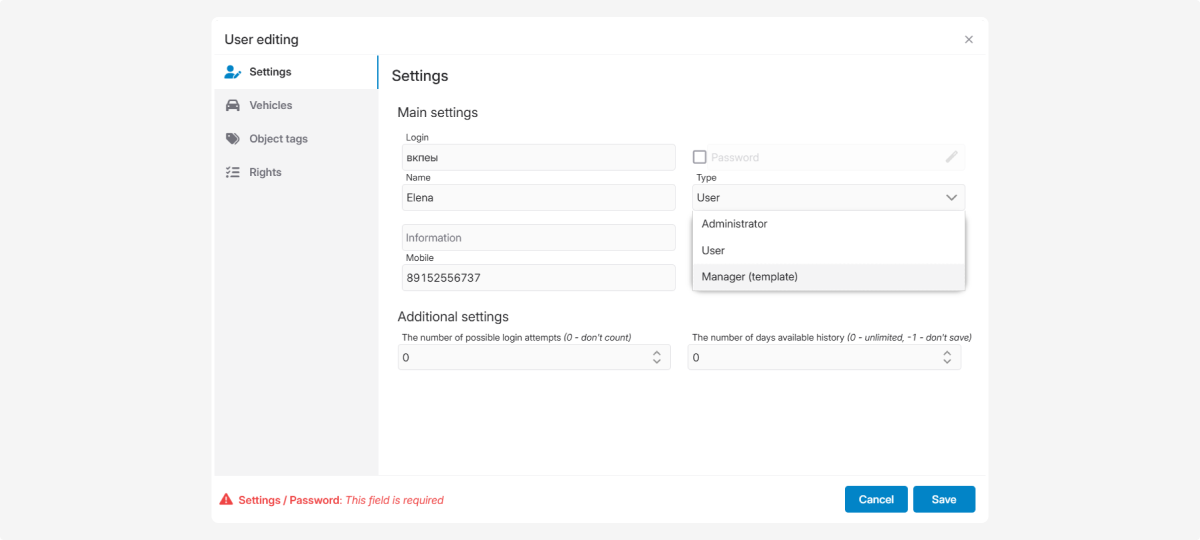
Applying a saved template:
1. When creating a new user, go to the User type field
2. Click the field to open the list of available templates
3. Select the template you need

4. Fill out the rest of the user card and save
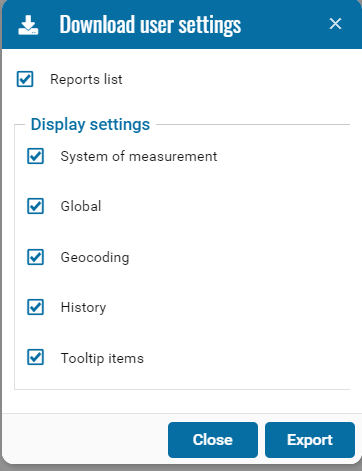
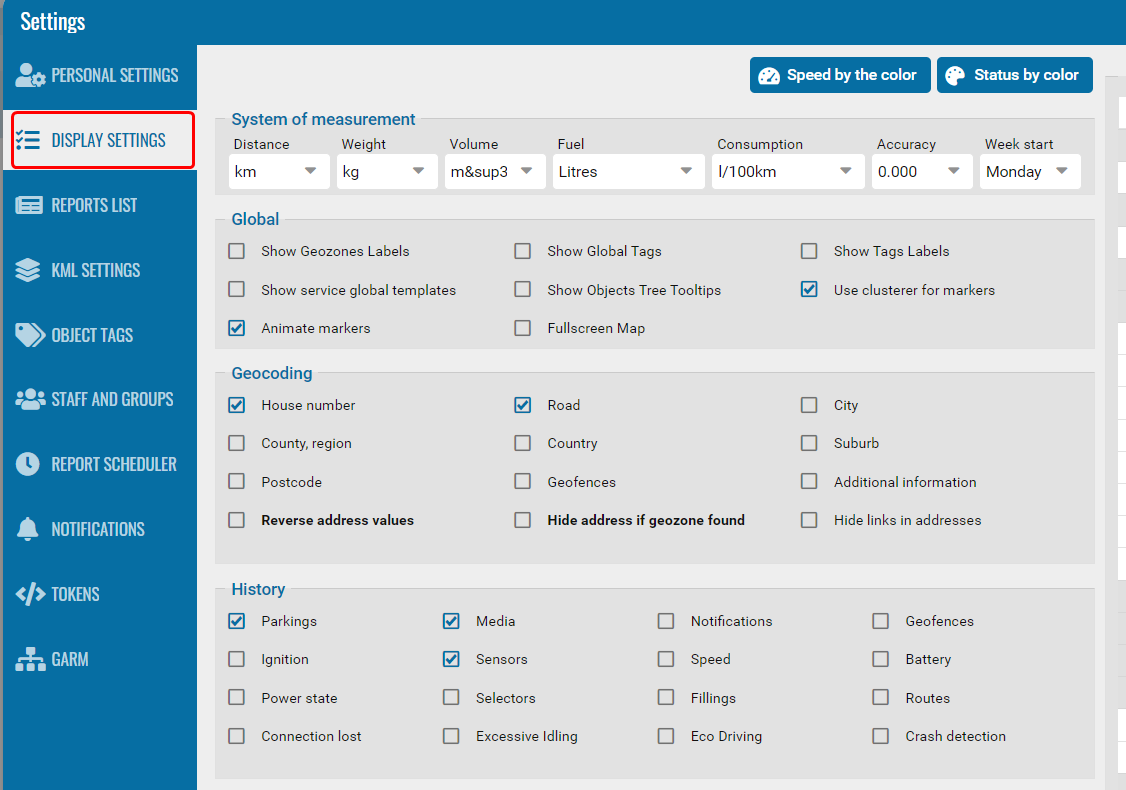
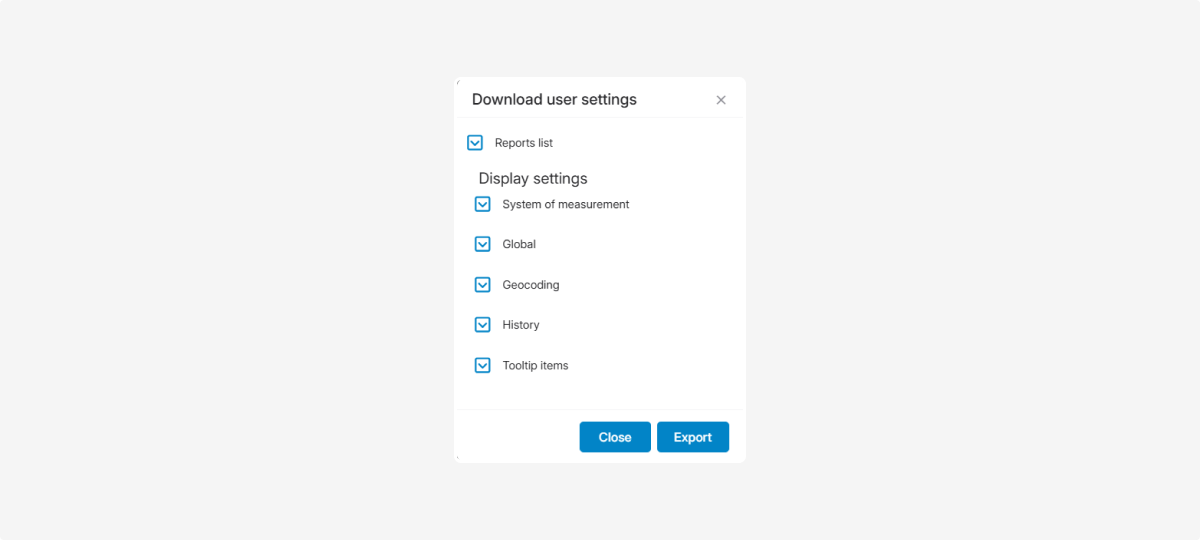
Using the display settings template, you can create and upload layout configurations into user accounts.
Only master users have access to creating and uploading display settings templates.
Regular user accounts will not show upload/export buttons.
|
A display settings template is used to quickly copy and transfer layout settings between accounts.
Using the template, you can copy all settings from the Personalization and Map and geocoding tabs:
• List of available reports
• Measurement system settings
• General display parameters
• Address format
• Event display on the history map
• Tooltip items
When display settings templates are useful:
• For integration partners managing multiple accounts
• When creating new accounts with similar settings
• To quickly copy settings between accounts
• To avoid configuring each account manually
How to export a template:
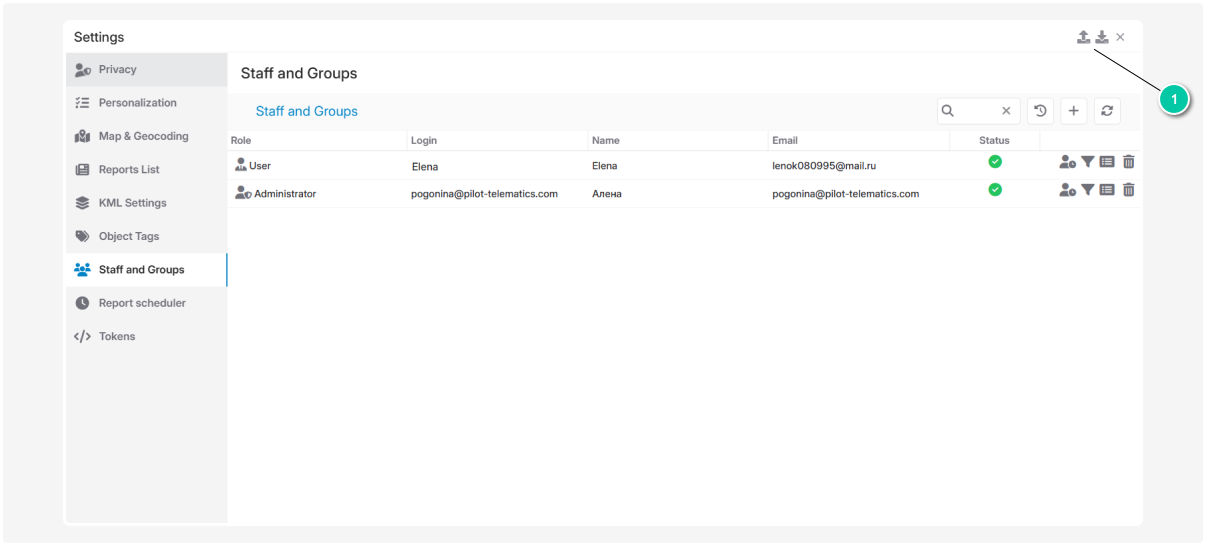
1. Go to the Staff and groups tab
2. Click the Download settings icon 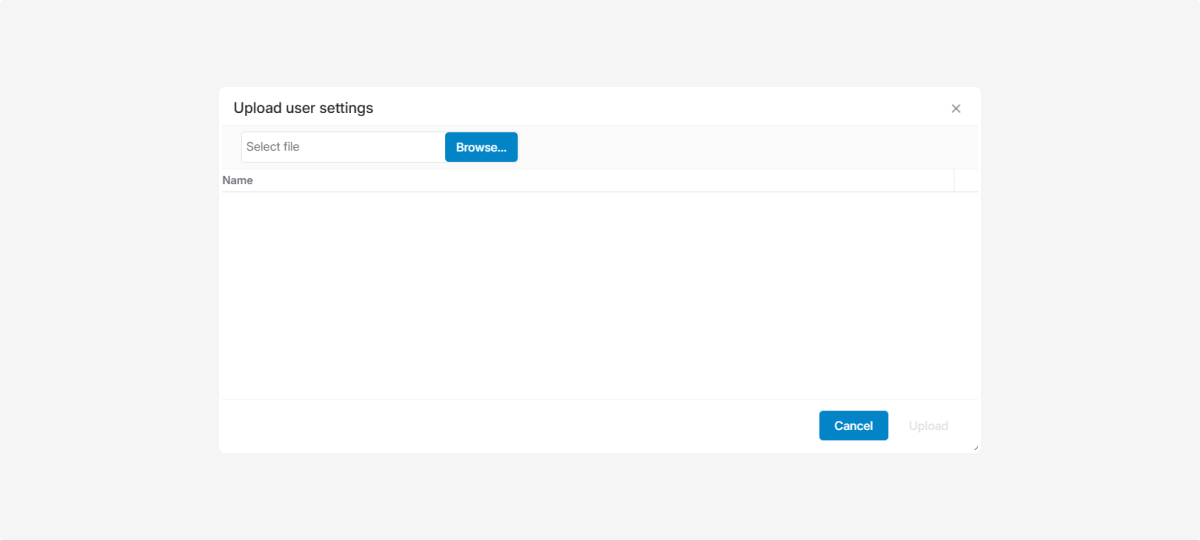
3. Tick the parameters you want to export

4. Click Export — the template file will be saved to your computer
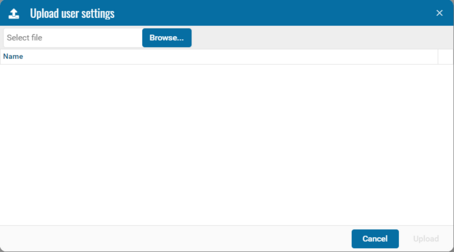
How to import a template:
1. Open the account where you want to apply the settings
2. Go to the Staff and groups tab
3. Click the Upload template icon 
4. Click Browse to select the saved file from your computer

5. Click Upload to apply the template
6. Reload the page to finalize the changes