How to link a geofence to an object
Linking a geofence to an object allows you to automatically track its movements, monitor idle time and speed, and receive notifications about any violations.
How to set it up:
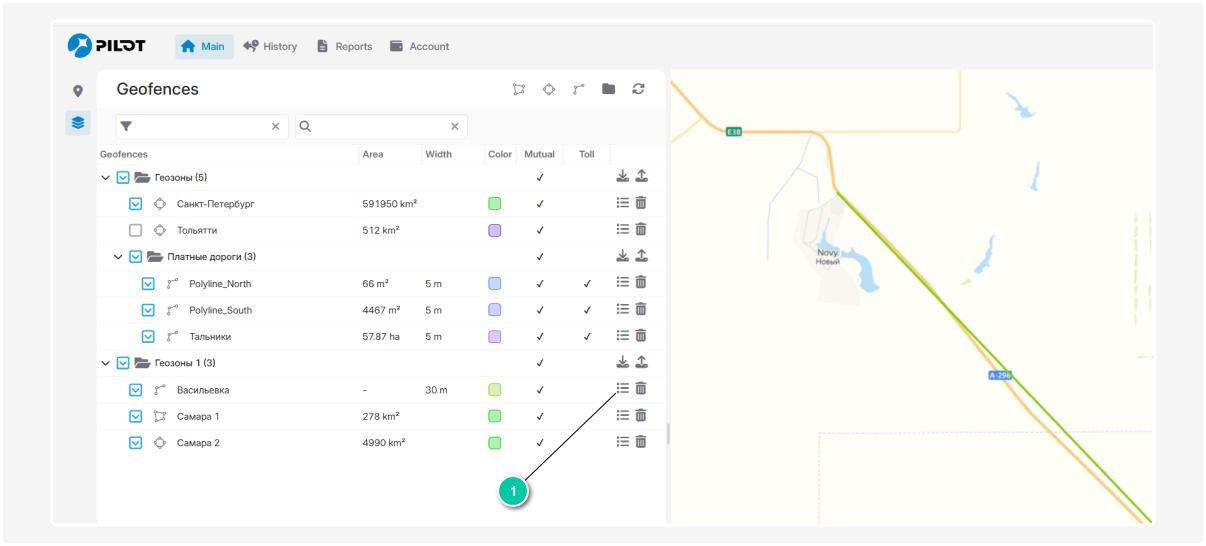
1. Open the settings for the desired geofence
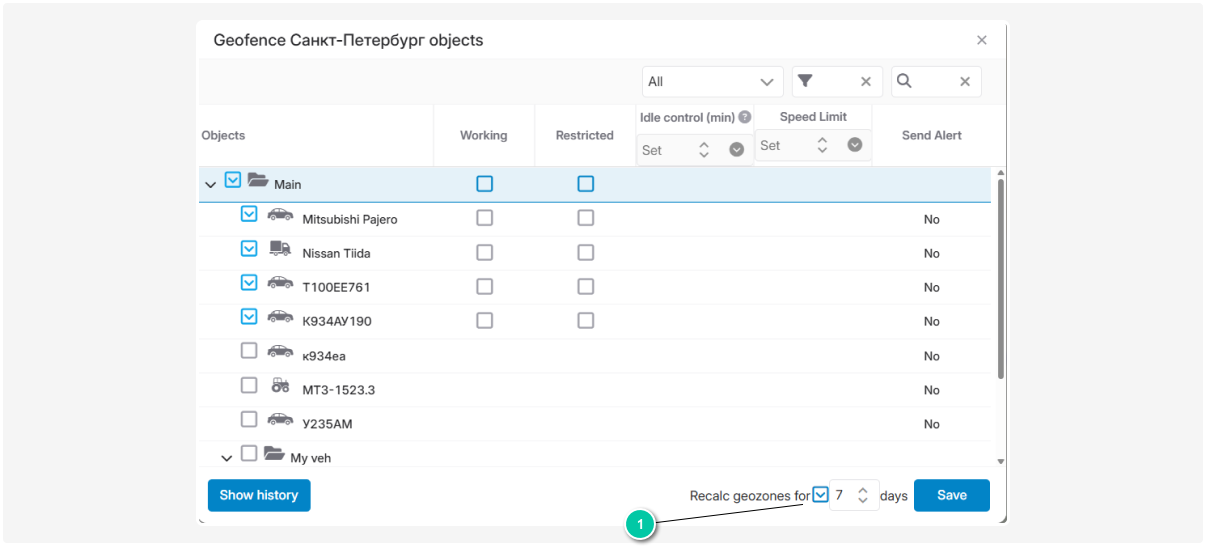
2. Link objects to the geofence:
Check the boxes next to the objects you want to associate with this geofence. The system will track their movements in relation to the selected zone and apply all the configured parameters.
3. Configure additional parameters:
-
Idle control:Set the number of minutes after which staying in the zone is considered idling. For example, if you set 15 minutes, the system will record an idle event if the object stays in the zone longer than that. If you set 0, idle time will not be tracked for this zone (this is the default). Idle data can be viewed in special idle reports and summary reports.
-
Speed limit:Set a speed limit for objects within this geofence.
-
Zone type:Choose whether the zone is a working or restricted area:— Working geofence: an area where the object should be and perform its tasks (e.g., warehouse, construction site, route)— Restricted geofence: an area where the object is not allowed to enter (e.g., private property, hazardous or closed zones, military sites)
-
Alert type:Set up the type of notification for this zone:— Idle in zone: the system will send a notification if the object stays in the zone longer than the set time— Border crossing: the system will send a notification when the object enters or leaves the geofence— Idle and border crossing: the system will send a notification for either event
-
Geofence recalculation:If you have changed the geofence settings or just created a new one, you can recalculate events for this zone for a previous period (for example, the last 7 days).To do this, check the box for Recalculate geofence for and select the number of days. The system will recalculate all events (entries, exits, idling, etc.) for the selected period using the new settings.4. Click Save to apply the geofence settings.
How to view geofence history
In the geofence settings, there is a Show history button
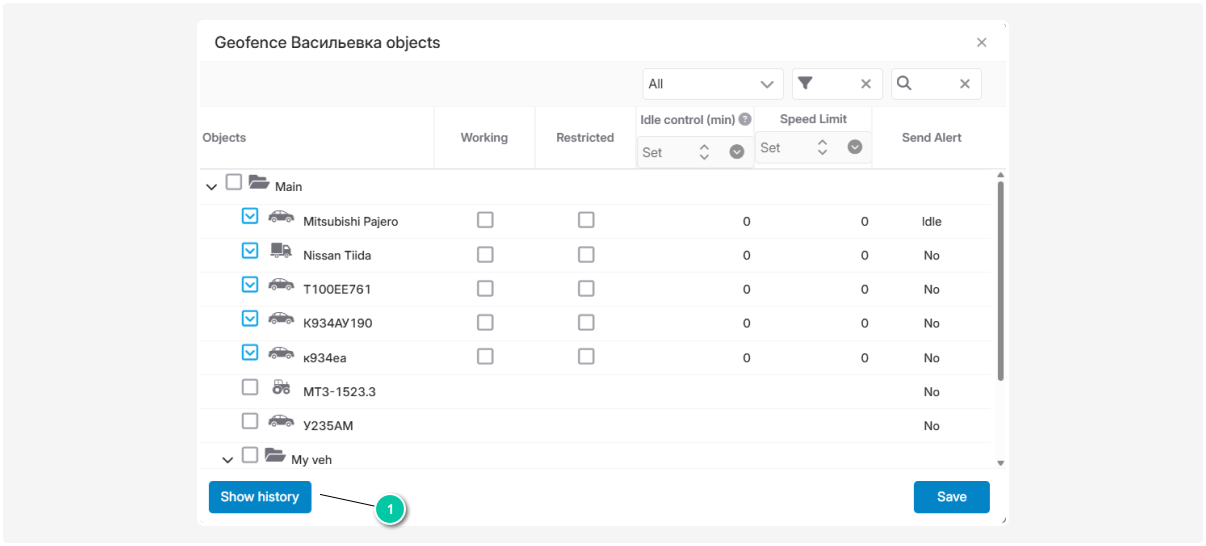
Click it to see:
-
The full history of object movements in this zone
-
Dates and times of each object's entry and exit
-
Duration of time spent in the zone
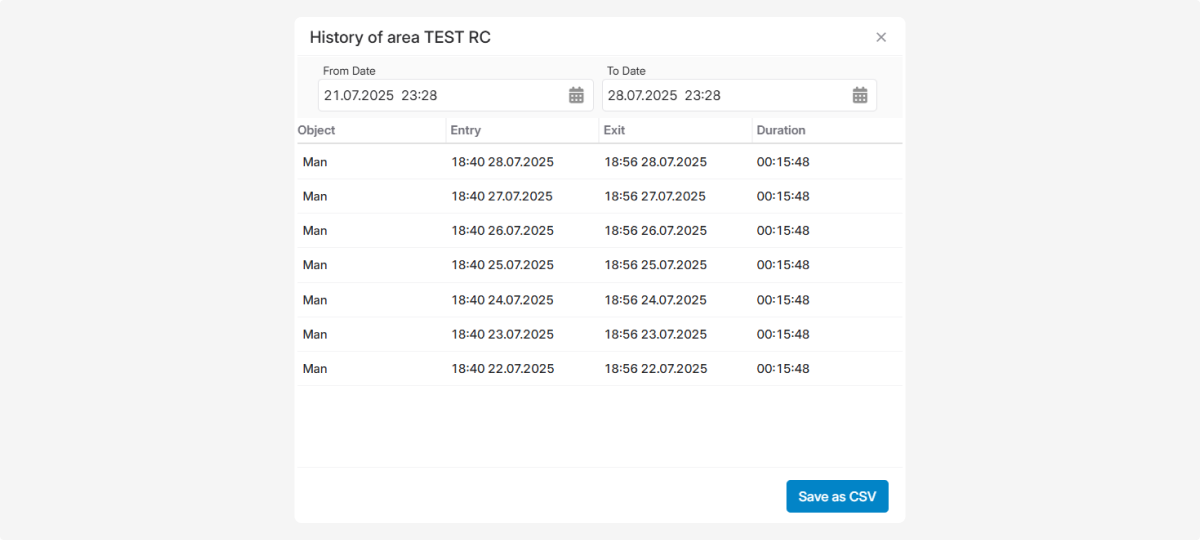
If you want to save the movement or event history for the geofence, click the Save as CSV button.